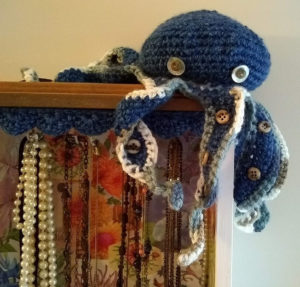
 This little OctoPal might seem daunting at first, but after you’ve made one, the method should make more sense. Note that there’s no standard yarn type, color or weight: Use any yarn you like, and whatever size crochet hook feels comfortable with it. Whatever size and appearance your OctoPal wants to be, it will be. You’re just going along for the ride.
All stitches used in this pattern are single crochet, including the increase and decrease stitches, and should be worked through both strands of the previous stitch (Except when working along the edge of a chain, which only has one strand of yarn).
This project doesn’t consume much yarn (I’ve been using a couple of ounces of acrylic medium weight yarn per OctoPal) and is a fun way to make use of yarn left over from other projects. I’ve formed a habit of making an OctoPal whenever I am relaxing with a movie—and they’re starting to stack up rather alarmingly.
The only stitches you’ll need to know are chains, single crochet, increasing stitches and decreasing stitches. The equipment you’ll need is yarn, a crochet hook, scissors, some cotton batting or stuffing and a safety pin. If you have an old sock that matches the eventual color of your OctoPal’s head, that’s a bonus. Oh, and SC means single crochet. It’s the only abbreviation I’ll use. I’d like this pattern to be friendly for beginners. Maybe someday you’ll be ready for the Perky Snood, but today is not that day.
If you need to polish your crochet skills, here’s a few tutorials on the stitches we will be using. If you’re already a whiz, just jump over them.
Printable PDF: Amigurumi Octopus Crochet Pattern
Pattern & photos © Lori Alden Holuta 2023. All rights reserved. This pattern is free and for your personal, non-commercial use only. You may sell any items made from this pattern. If you adapt the pattern, please give me credit. This pattern was originally published at brasssbrightcity.com.
OctoPal! Amigurumi Crochet Octopus Pattern
RING OF TENTACLES
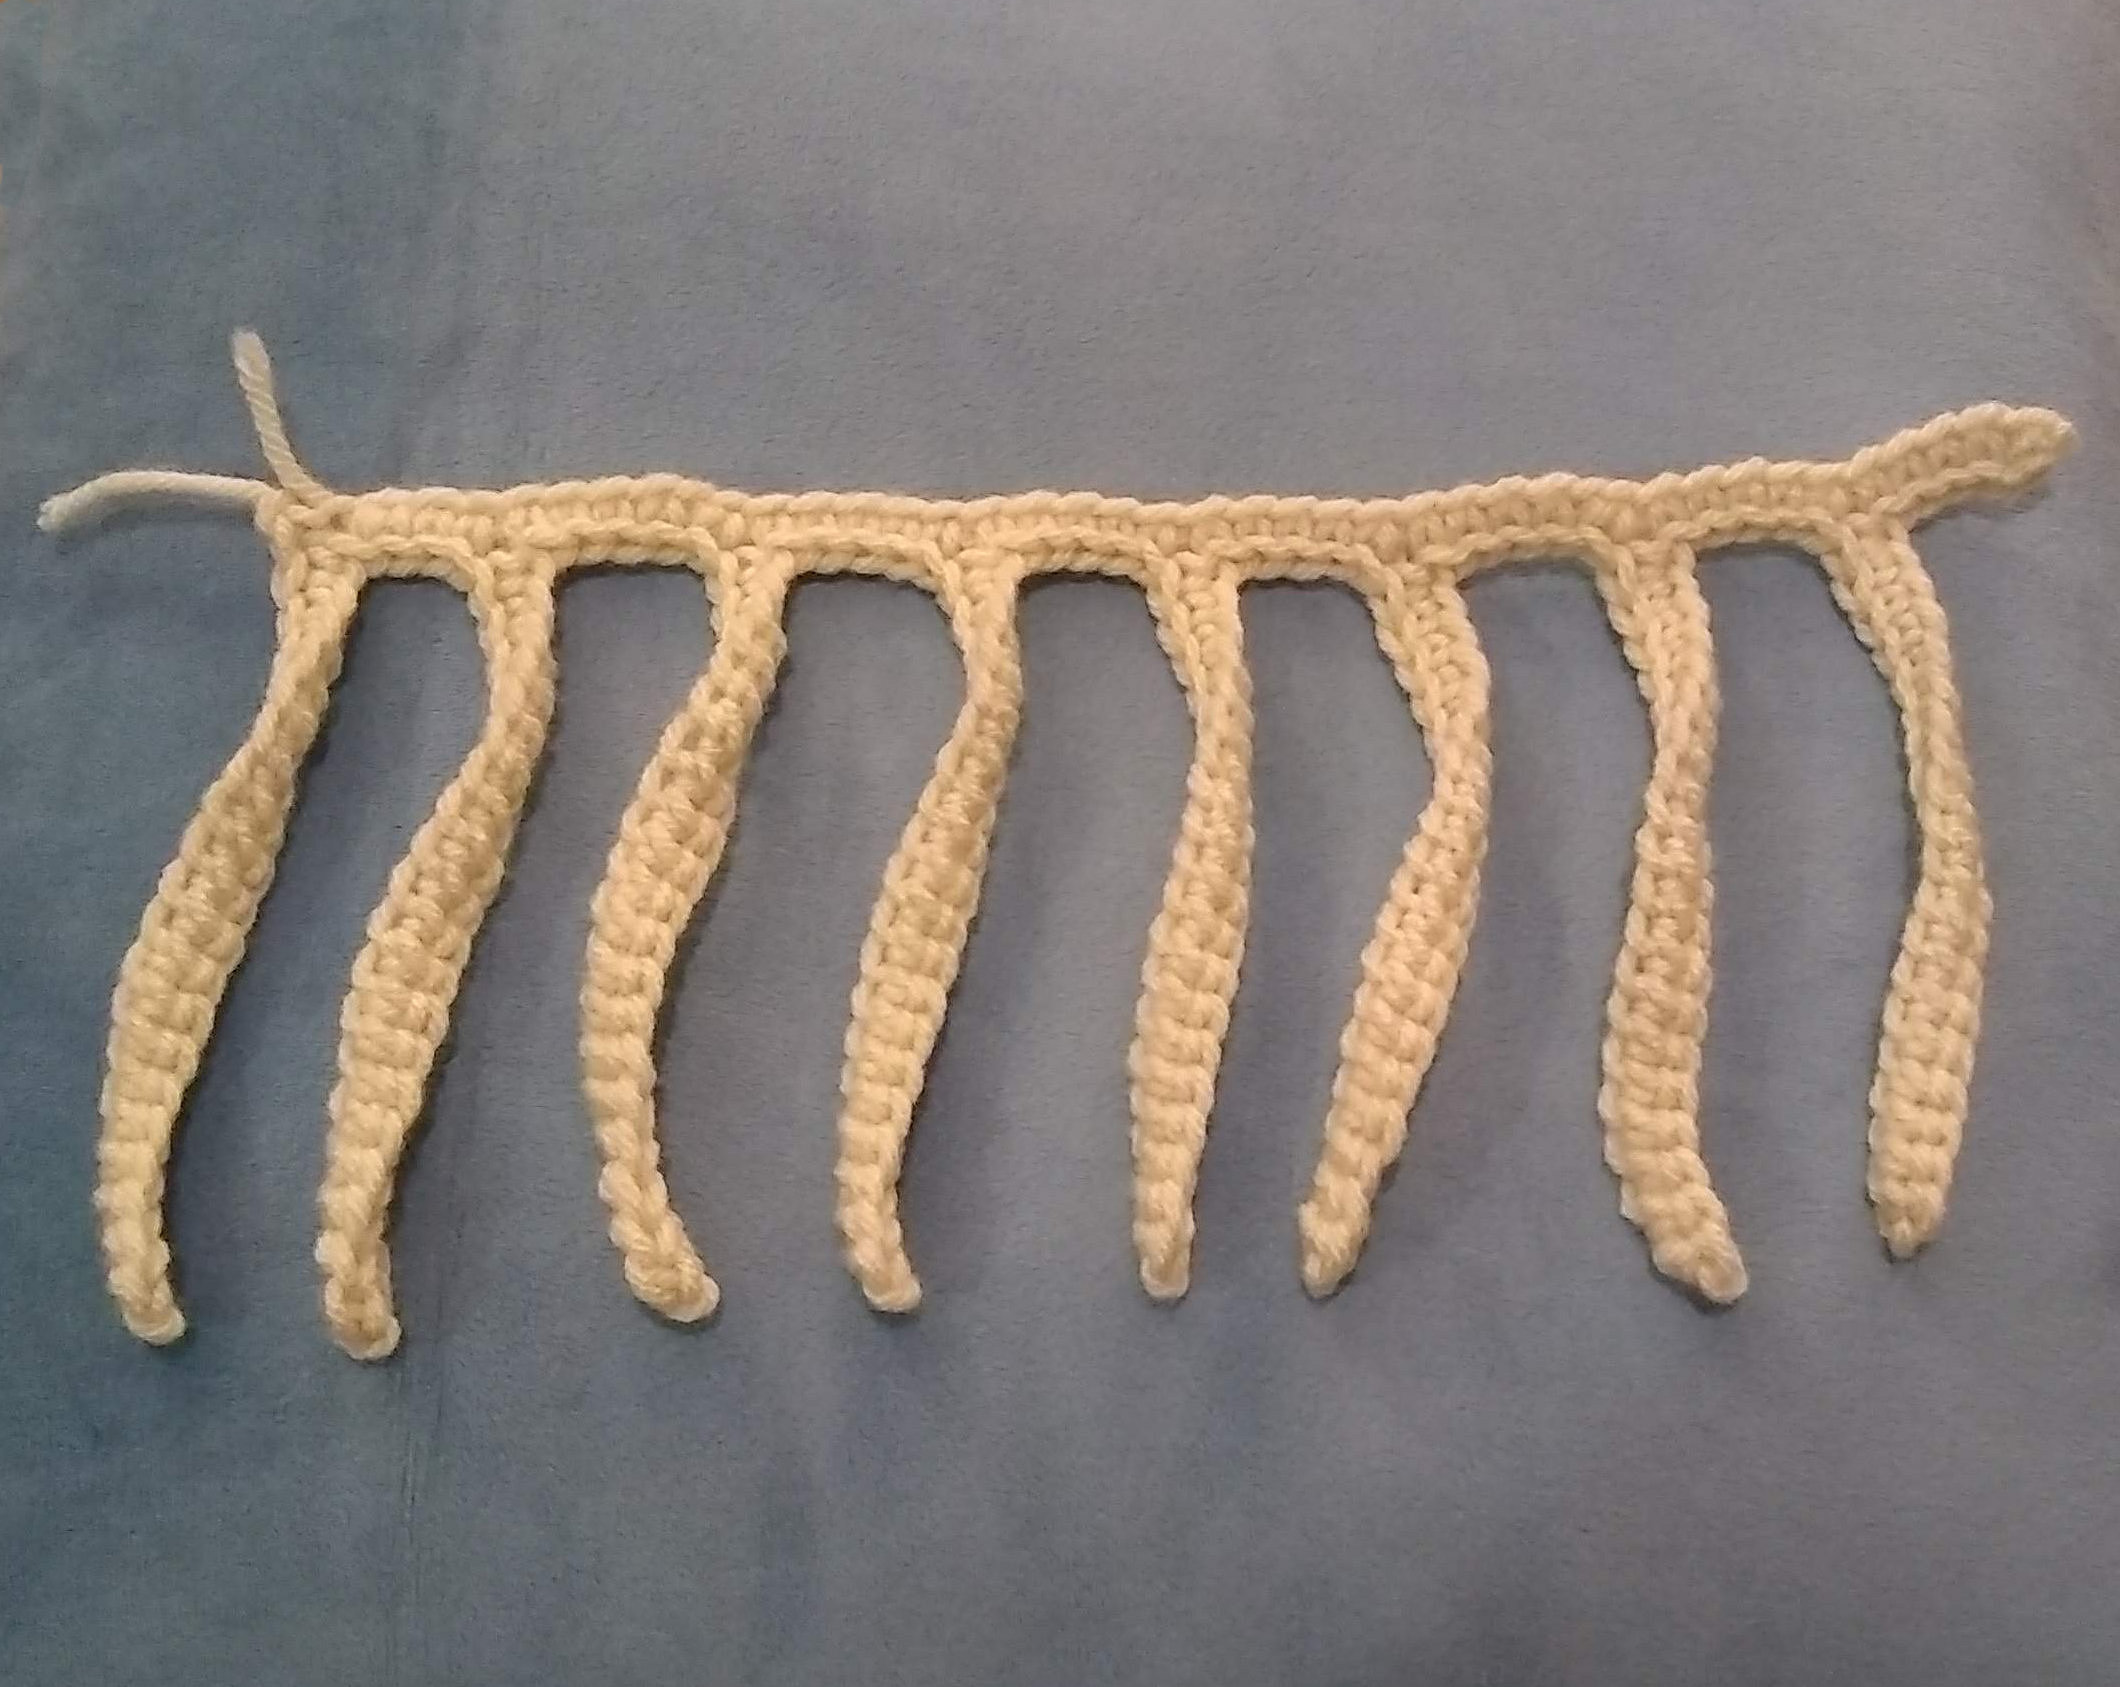
With a solid color yarn, chain 41
Turn, SC in 2nd chain and next 4 chains (5 SC)
1st THROUGH 7th TENTACLES (Repeat 7 times)
Chain 21
Turn, SC in second chain and next 19 chains (20 SC) You have now arrived back at the original chain.
SC in 5 chains
8th TENTACLE
Chain 21
Turn, SC in second chain and next 19 chains (20 SC) You have now arrived back at the original chain.
This completes the tentacles base. You should have one long chain with 8 shorter chains dangling from it.

ADDING TENTACLE SHAPE
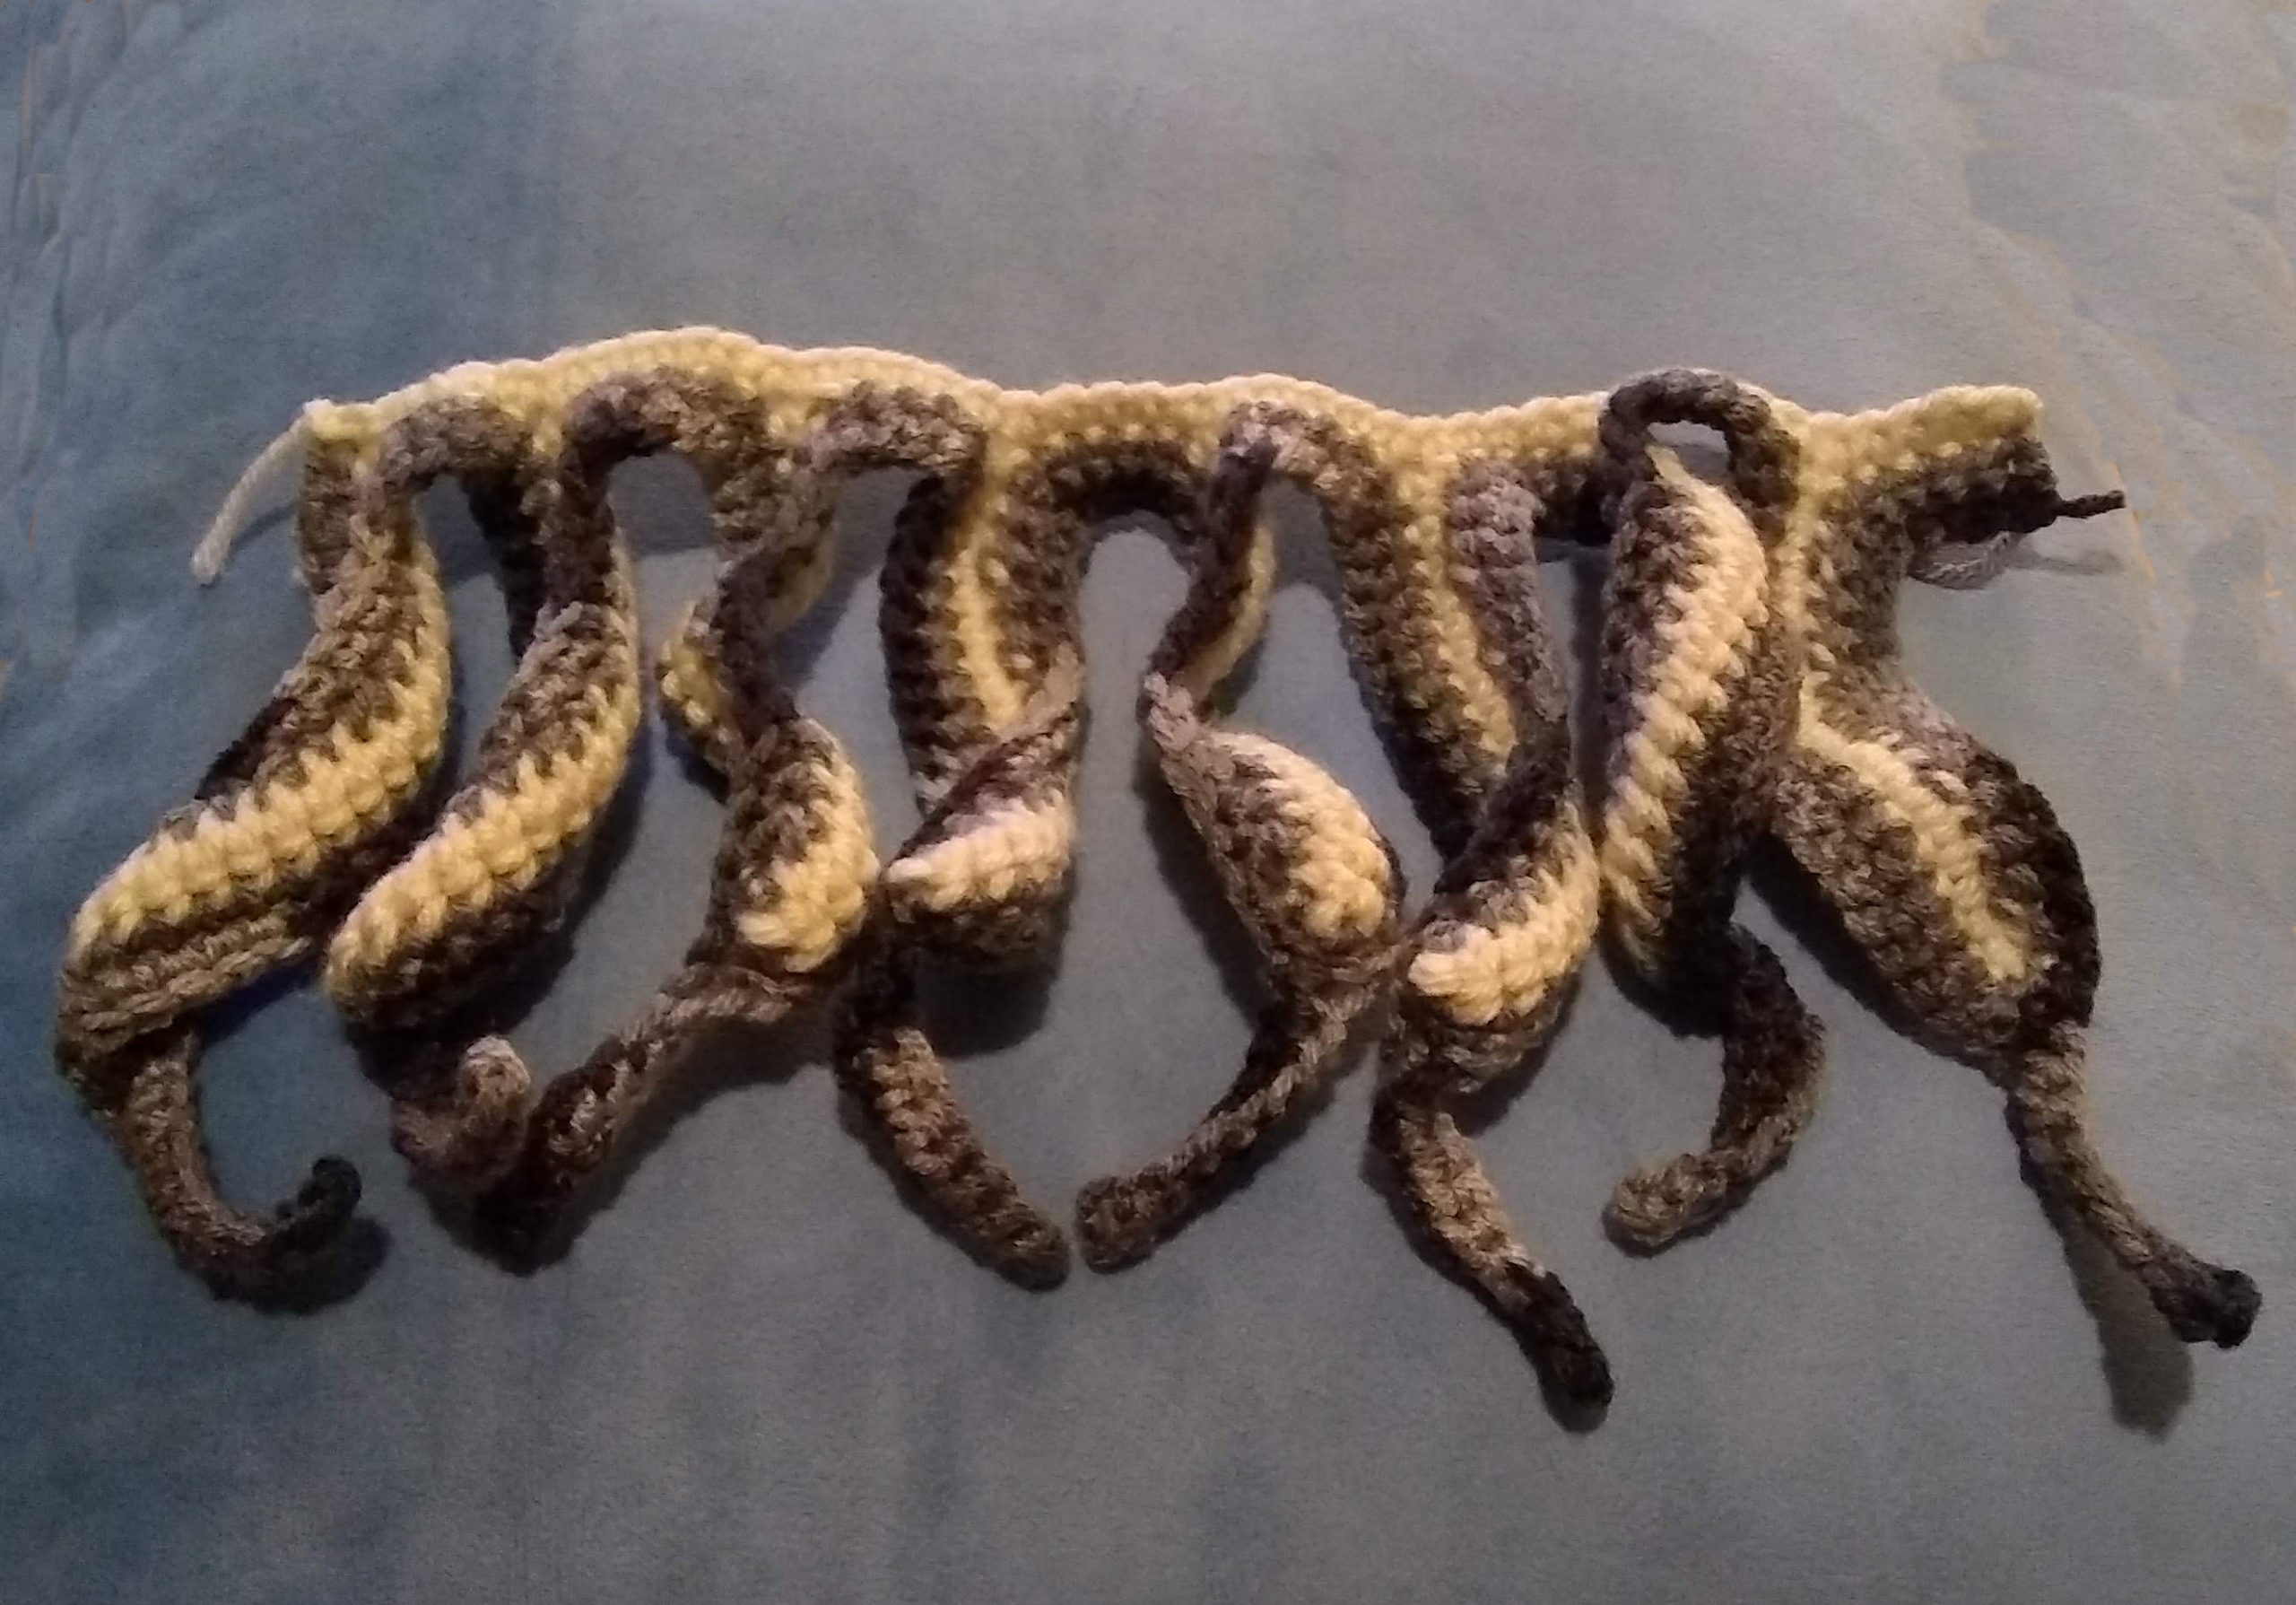
Overview: Always working SC into each SC, crochet up the side of each tentacle, then down the other side of each tentacle (adding reduction stitches to help the tentacle curl), across the separating space between tentacles, and repeat until you have worked across all eight tentacles.
If desired, cut yarn and change yarn color before continuing.
Chain 1, turn
SC up the side of the first tentacle until you reach the tip.
Turn. You will be working SC down the backside of the original tentacle chain, which is just a single loop instead of a full crochet stitch. SC in first chain, reducing stitch into the next two chains. Repeat, alternating SC and reducing stitch until you are back at the long base chain. SC in each chain until you reach the next tentacle.
Repeat until you have crocheted up and over all tentacles. Cut yarn and bind off.

EXPANDING AND LENGTHENING TENTACLES
In a contrasting color (variegated yarns are my favorites for this) pull a loop up through the first stitch on the long chain-row to begin.
Working a SC into each SC, crochet your way to the tip of the first tentacle.
As you reach the tip of each tentacle, chain 11 and turn.
SC in second chain from hook and following 9 chains (10 SC).
Continue working in SC down the other side of the tentacle, then into the gap between tentacles, and up the next tentacle.
Repeat, remembering to add the extending chain at the tip of each tentacle.
When you have worked all the way across all the tentacles, cut yarn and bind off.

COMPLETING THE CIRCLE OF TENTACLES
Using a bit of the closest-matching yarn, slip-stitch the ends of the long base chain together, forming a ring . Make sure the ring isn’t twisted. All tentacles should dangle down from the same side.
OCTOPUS NECK
Turn the ring of tentacles so you can work on the opposite edge of the base chain. This is the edge that the tentacles are NOT on. Pull a loop of yarn up through any stitch to start your first row of the neck.
1st Row: Work a decreasing stitch into two stitches. Repeat, working only decreasing stitches all the way around.
Start your next row by crocheting into the first stitch of the previous row. Add a stitch marker (I use a safety pin) so you will always know where the rows end, but continue to crochet in a seamless spiral. This will eliminate harsh-looking joining lines between rows.
2nd Row: Repeat 1st row.
The ‘neck’ should now be extremely pinched in. In the next step, you will start increasing the rows to form a rounded head.

OCTOPUS HEAD
1st through 3rd Rows: Work two SC into each stitch (increasing stitch). Repeat increasing stitches all the way around.
4th Row: SC in two stitches, then an increasing stitch in the next two stitches. Repeat all the way around.
5th and 6th Rows: SC in each SC all the way around.
7th and 8th Rows: SC in one stitch, then one decreasing stitch in the next two stitches. Repeat all the way around.
9th and 10th Rows: SC all the way around
11th Row and Onward: 2 SC, then one decreasing stitch in the next two stitches. Repeat over and over until the head has closed up to about a 1-1/2” hole. (if the top of the head starts to form a point, you’ve gone too far!) Cut yarn, leaving a 6” tail. Pull the yarn-tail through each open stitch, weaving back and forth until you are back where you started. Pull the yarn to cinch the stitches closed. Knot the end tightly and pull any remaining yarn through to the inside of the head to hide it.

FINISHING TOUCHES
From the open underside, use small handfuls of cotton batting to stuff the head, pushing stuffing into any puckers to smooth them out. Push the stuffing around inside the head until it is a shape and smoothness you like. Since the ‘neck’ of the head will not be sewn shut, you may want to press a small square of cloth into the opening to hide and protect the stuffing. If you’ve used a dark yarn, and your stuffing is white, you can press a square of dark cloth, or the toe of an old sock into the head before stuffing so it doesn’t show through.
Using buttons, sew eyes onto the head. A large button can be topped with a smaller darker button (stack and sew on together) for an expressive eyeball. Keep them low and towards the front.
If you want suckers on your tentacles, you can sew on small shirt buttons, or pearls.
